Getting started
Tutorials
Functional Areas
Documentation
Reference
OwinFramework
Authorization
Facilities
Middleware
- OwinFramework.AnalysisReporter
- OwinFramework.Dart
- OwinFramework.DefaultDocument
- OwinFramework.Documenter
- OwinFramework.ExceptionReporter
- OwinFramework.FormIdentification
- OwinFramework.Less
- OwinFramework.NotFound
- OwinFramework.OutputCache
- OwinFramework.RouteVisualizer
- OwinFramework.Session
- OwinFramework.StaticFiles
- OwinFramework.Versioning
Pages
- OwinFramework.Pages.Core
Attributes
- OwinFramework.Pages.DebugMiddleware
- OwinFramework.Pages.Framework
- OwinFramework.Pages.Html
Element type attributes
Elements
General attributes
Layout attributes
Page attributes
Region attributes
- Templates
- OwinFramework.Pages.Mocks
- OwinFramework.Pages.Restful
Attributes
Elements
- OwinFramework.Pages.Core
Functional areas
Projects
- OwinFramework
- Configuration ConfigurationManager
- Configuration Urchin
- Mocks
- Facilities Cache Local
- Facilities IdentityStore Prius
- Facilities TokenStore Cache
- Facilities TokenStore Prius
- AnalysisReporter
- Dart
- DefaultDocument
- Documenter
- ExceptionReporter
- FormIdentification
- Less
- NotFound
- OutputCache
- RouteVisualizer
- Session
- StaticFiles
- Versioning
- Authorization
- Authorization Core
- Authorization Prius
- Authorization UI
- Pages Core
- Pages DebugMiddleware
- Pages Framework
- Pages Html
- Pages Mocks
- Pages Restful
Microservice Walkthrough
This is a step-by-step walkthrough of creating a simple microservice using the Owin Framework.
This walkthrough assumes that you have already completed the Hello, World walkthrough. If you have not completed it yet I suggest you at least read through these instructions before continuing with this walkthrough.
This walkthrough builds a microservice with these features:
- The microservice has an endpoint where you can POST a form to register a new user based on an email address and a password. Each user is allocated a unique ID.
- The microservice will not allow the same email address to be registered twice.
- The microservice has endpoints that you can POST a form to for logging in and logging out.
- The microservice has an endpoint that returns the user ID for the logged in user (based on session cookie) or empty string if the user is not logged in.
- The microservice has a very simple administration UI that shows a list of all of the registered users and whether they are currently logged in or not.
To keep down the scope of this walkthrough and concentrate on the aspects of how to build a microservice and not how to build a database, this solution will only retain data in memory. All of the registered users will be wiped each time the service is restarted.
Overview
The steps you will follow in this walktrhough are as follows:
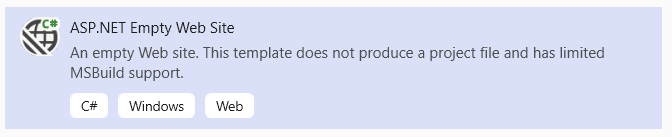
- Create a new Visual Studio solution using the "ASP.Net Empty Web Site" project template
- Add the required Nuget packages to the solution
- Write a Startup.cs and a Package.cs file that configures all the libraries and wires everything up
- Define an interface to the data layer and create a test implementation that only saves data in memory
- Add a class that implements the user service endpoints
- Add a test page with forms for registration, login and log out just for testing
- Add an administration page that shows users and live updates when there are changes
This walktrhough differs from writing a real microservice in these ways:
- The data layer would need to persist the data to a persistent storage mechanism such as an RDBMS, NoSQL or Graph Database.
- All of the important classes should have unit tests. This is a much better approach than adding a test page because the tests are thorough, repeatable and can be automated.
Starting a new Visual Studio solution
The most educational way of doing this walkthrough is by starting from a completely empty project and add all of the code. You don't need to actually type the code, copy/paste will work just fine.
-
In Visual Studio start a new project of type "ASP.NET Empty Web Site".
This will create a project that contains very little. In Visual Studio 2019
the project template looks like this:
-
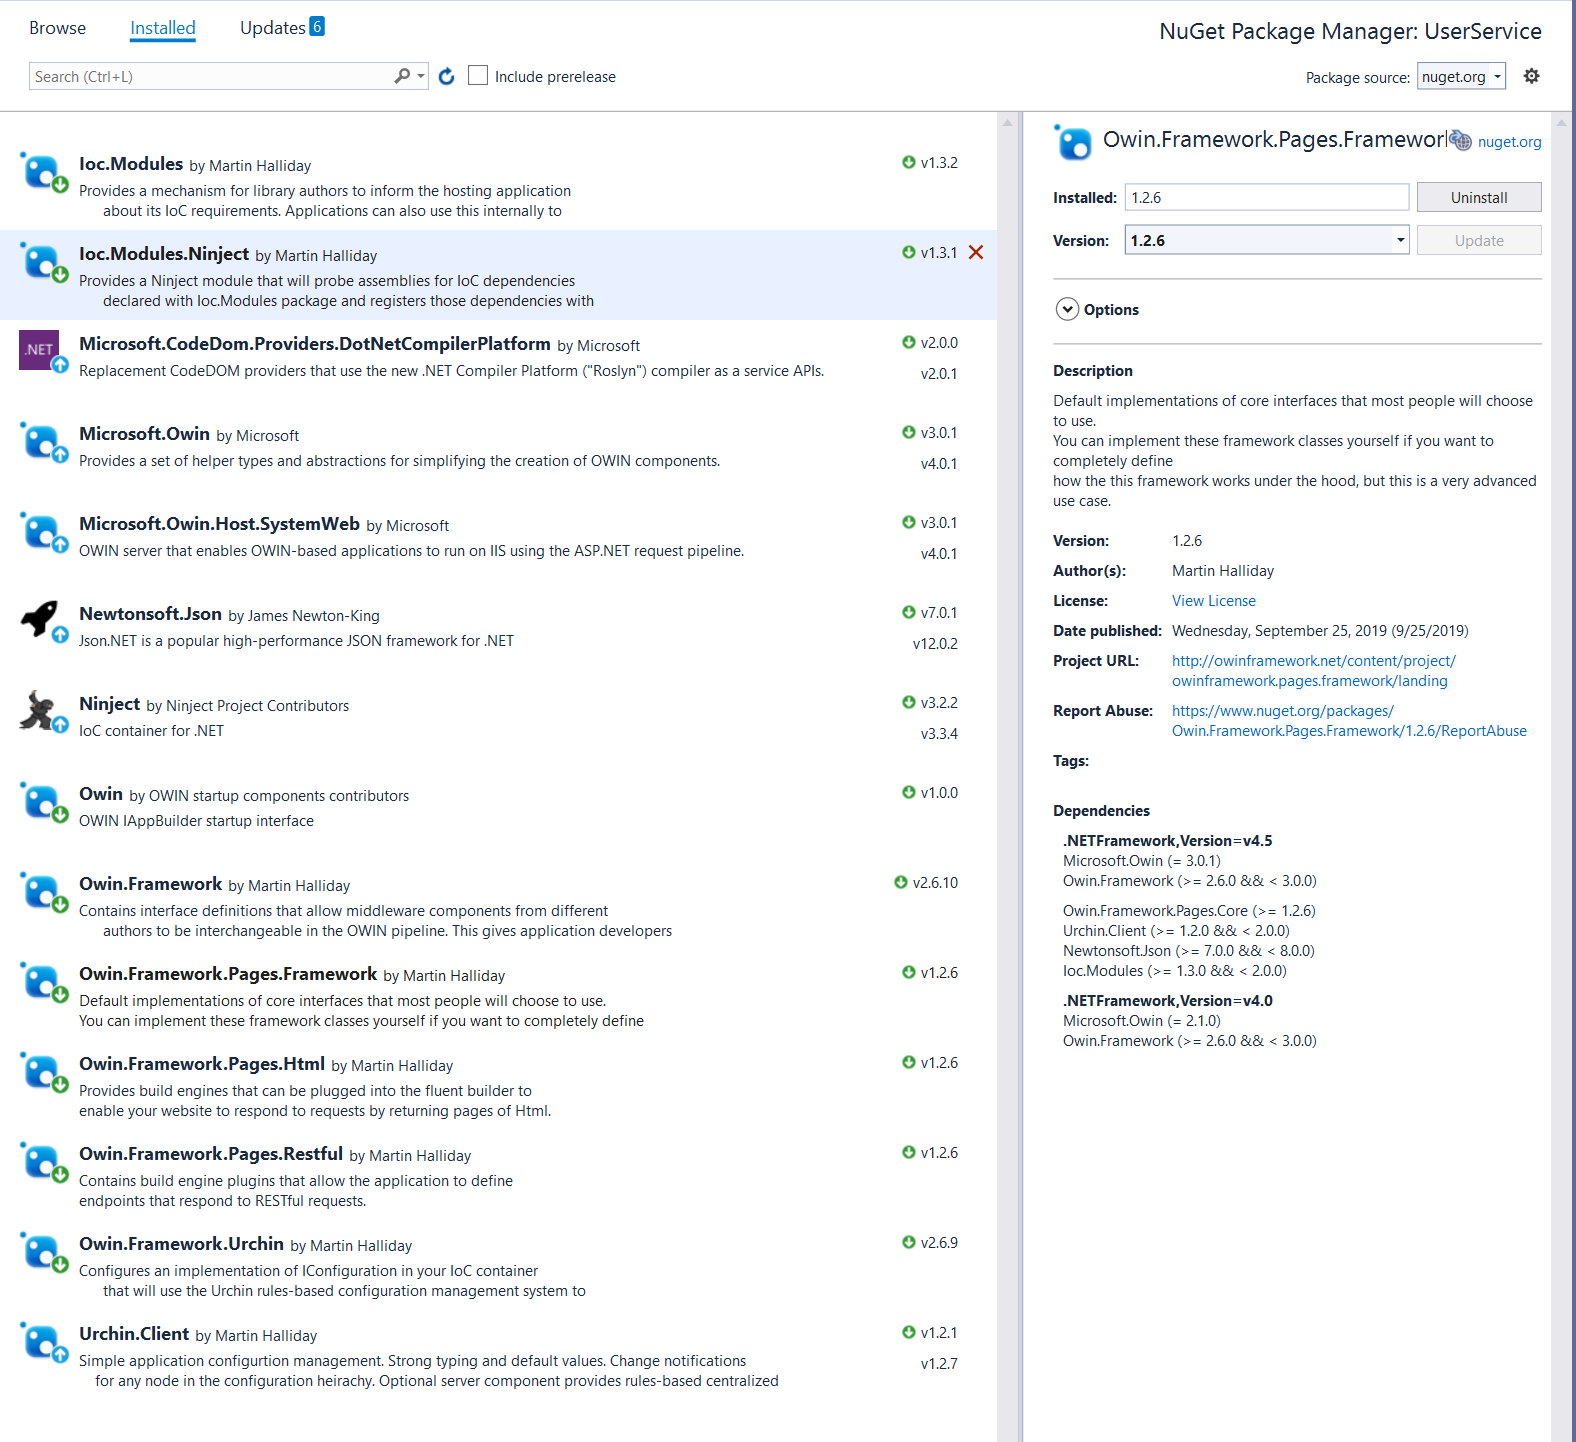
Install these NuGet packages
- Ioc.Modules.Ninject
- Owin.Framework
- Owin.Framework.Urchin
- Owin.Framework.Pages.Core
- Owin.Framework.Pages.Framework
- Owin.Framework.Pages.Restful
- Owin.Framework.Pages.Html
- Microsoft.Owin.Host.SystemWeb
After installing, the Nuget Package Manager will look something like this (version numbers will vary depending on which .Net Framework version you chose)
Configure your project as an OWIN website hosted on IIS
Note that this step would be required for any OWIN application and is not specific to the Owin Framework.
The steps required here are the same as for the Hello, World walkthrough. Please refer back to it for more details. Note that if your project is a "Web APplication" type then you will create the Startup.cs file in the App_Code folder.
Configure an IoC container
For this walkthrough we are going to use Ninject and Urchin, but you can use any IoC container and any configuration mechanism you choose. There is documentation you can read and copy code from, or you can copy from the hello world example
Read the documentation to figure out what code you need to add, or just copy the code below into the Configuration method of your Startup class to get going quickly.
var packageLocator = new PackageLocator()
   .ProbeBinFolderAssemblies()
   .Add(Assembly.GetExecutingAssembly());
var ninject = new StandardKernel(new Ioc.Modules.Ninject.Module(packageLocator));
Set up the Owin Framework middleware pipeline
This is the first step in this walktrhough that is specific to the Owin Framework
You can review the documentation on Owin Framework configuration, or you can look at Startup.cs for a working example to copy from.
An example of the type of code you will need to add to the Configuration method of your Startup class is shown below for reference. In a real application there are a number of ways that you can write this code. For this walkthrough you can copy/paste if you like.
var config = ninject.Get<IConfiguration>();
var pipelineBuilder = ninject.Get<IBuilder>();
pipelineBuilder.Register(ninject.Get<PagesMiddleware>()).ConfigureWith(config, "/pages");
app.UseBuilder(pipelineBuilder);
At this point your Startup.cs file might look something like this:
using Ioc.Modules;
using Microsoft.Owin;
using Ninject;
using Owin;
using OwinFramework.Builder;
using OwinFramework.Interfaces.Builder;
using OwinFramework.Pages.Core;
using System.Reflection;
[assembly: OwinStartup(typeof(Startup))]
public class Startup
{
    public void Configuration(IAppBuilder app)
    {
        var packageLocator = new PackageLocator()
           .ProbeBinFolderAssemblies()
           .Add(Assembly.GetExecutingAssembly());
        var ninject = new StandardKernel(new Ioc.Modules.Ninject.Module(packageLocator));
        var config = ninject.Get<IConfiguration>();
        var pipelineBuilder = ninject.Get();
        pipelineBuilder.Register(ninject.Get<PagesMiddleware>()).ConfigureWith(config, "/pages");
        app.UseBuilder(pipelineBuilder);
    }
}
Configure the Pages middleware
In this section you will configure the Pages middleware to scan your compiled code and construct services and web pages from classes that are decorated with custom attributes.
-
At the end of the Configuration method in your Startup class,
resolve IFluentBuilder from your IoC container, for example
var fluentBuilder = ninject.Get<IFluentBuilder>();
-
Install the Restful service build engine so that we can define services by decorating classes
with attributes. The code will be similar to this:
ninject.Get<OwinFramework.Pages.Restful.BuildEngine>().Install(fluentBuilder);
-
Install the Html element build engine so that we can add web pages to our microservice by
decorating classes with attributes. The required code is similar to this:
ninject.Get<OwinFramework.Pages.Html.BuildEngine>().Install(fluentBuilder);
-
Get the fluent builder to scan your application assembly for classes that are
decorated with attributes that makes them into definitions of serices, pages, regions,
layouts etc. The fluent builder will use the build engines that we configured earlier.
The extra line of code you need to add for this is:
fluentBuilder.Register(Assembly.GetExecutingAssembly());
-
Finally, after registering all of the elements of your website with the fluent
builder you need to bind the elements together because they can reference each other
by name, and they can be registered in any order. You will need this line of
code to do this:
ninject.Get<INameManager>().Bind();
At this point your Startup.cs file should look something like this:
using Ioc.Modules;
using Microsoft.Owin;
using Ninject;
using Owin;
using OwinFramework.Builder;
using OwinFramework.Interfaces.Builder;
using OwinFramework.Pages.Core;
using OwinFramework.Pages.Core.Interfaces.Builder;
using OwinFramework.Pages.Core.Interfaces.Managers;
using System.Reflection;
[assembly: OwinStartup(typeof(Startup))]
public class Startup
{
    public void Configuration(IAppBuilder app)
    {
        var packageLocator = new PackageLocator()
            .ProbeBinFolderAssemblies()
            .Add(Assembly.GetExecutingAssembly());
        var ninject = new StandardKernel(new Ioc.Modules.Ninject.Module(packageLocator));
        var config = ninject.Get<IConfiguration>();
        var pipelineBuilder = ninject.Get<IBuilder>();
        pipelineBuilder.Register(ninject.Get<PagesMiddleware>()).ConfigureWith(config, "/pages");
        app.UseBuilder(pipelineBuilder);
        var fluentBuilder = ninject.Get<IFluentBuilder>();
        ninject.Get<OwinFramework.Pages.Restful.BuildEngine>().Install(fluentBuilder);
        ninject.Get<OwinFramework.Pages.Html.BuildEngine>().Install(fluentBuilder);
        fluentBuilder.Register(Assembly.GetExecutingAssembly());
        ninject.Get<INameManager>().Bind();
    }
}
Adding service endpoints
There are many ways to add Restful service endpoints, but the easiest way is to add a class and decorate it with attributes, so lets do that. Go ahead and create a new class in the solution called HelloService.cs containing the following code:
using OwinFramework.Pages.Core.Attributes;
using OwinFramework.Pages.Core.Enums;
using OwinFramework.Pages.Restful.Interfaces;
[IsService("hello", Methods = new[] { Method.Get })]
public class HelloService
{
    [Endpoint(UrlPath = "/")]
    public void Hello(IEndpointRequest request)
    {
        request.Success("{message:'Hello, this is a microservice'}");
    }
}
Now you can press F5 in Visual Studio and your microservice will handle the request and return a hello message.
Wow, that was easy!
All of your basic restful endpoints will be simple like this, but even the most complex scenarios are supported in a way that makes it as easy as possible to hide the complexity without sacrificing scaleability. See the Restful builder documentation for more information on how to take this up to the next level.
The only issue you are likely to encounter at this point is about version compatibility of Nuget packages. Most open source projects support a wide variety of frameworks and versions of .Net, but Microsoft's packages do not, and this leads to a situation where is can be quite hard to find a combination of Nuget package versions that work together.
The developers of the Owin Framework try to provide versions that are compatible with every version but Microsoft makes this very hard and there are many projects to update each time, so this is a far from ideal situation. We appologize if you experience Nuget version incompatibilities at this point in the walkthrough.
If your solution does not run at this point, open the Visual Studio "Output" window and look at the debug messages printed here. Pay special attention to the messages from the "Package locator".
Building a dummy data layer
In order to see a few more features and look at an example closer to the real world we are going to need a bit more code. Go ahead and add a data layer interface definition, an implementation of this interface, and instructions to IoC to register this class as a singleton.
To keep this walkthrough simple we can add all of this to one source file, but in your application you would break this up into one source file per type.
DataLayer.cs
using Ioc.Modules;
using Newtonsoft.Json;
using System;
using System.Collections.Generic;
using System.Linq;
public enum RegisterResult
{
    Registered,
    PasswordTooSimple,
    DuplicateEmail,
    InvalidEmail
}
public class User
{
    [JsonProperty]
    public string Email { get; set; }
    [JsonIgnore]
    public string Password { get; set; }
    [JsonProperty]
    public string LoginToken { get; set; }
}
public interface IDataLayer
{
    RegisterResult Register(string email, string password);
    string Login(string email, string password);
    void Logout(string loginToken);
    User[] GetUsers();
}
[Package]
public class DataLayerPackage : IPackage
{
    public string Name => "Data layer";
    public IList<IocRegistration> IocRegistrations => new List<IocRegistration>
    {
        new IocRegistration().Init<IDataLayer, DataLayer>()
    };
}
public class DataLayer: IDataLayer
{
    private readonly object _lock = new object();
    private User[] _users = new User[0];
    public User[] GetUsers()
    {
        return _users;
    }
    public RegisterResult Register(string email, string password)
    {
        if (string.IsNullOrWhiteSpace(email) || email.Count(c => c == '@') != 1)
            return RegisterResult.InvalidEmail;
        if (string.IsNullOrWhiteSpace(password) || password.Length < 5)
            return RegisterResult.PasswordTooSimple;
        lock(_lock)
        {
            if (_users.FirstOrDefault(u => string.Equals(u.Email, email, StringComparison.OrdinalIgnoreCase)) != null)
                return RegisterResult.DuplicateEmail;
            var newUser = new User
            {
                Email = email,
                Password = password,
                LoginToken = Guid.NewGuid().ToString("n")
            };
            var users = _users.ToList();
            users.Add(newUser);
            _users = users.ToArray();
        }
        return RegisterResult.Registered;
    }
    public string Login(string email, string password)
    {
        var user = _users.FirstOrDefault(u =>
            string.Equals(u.Email, email, StringComparison.OrdinalIgnoreCase) &&
            u.Password == password);
        if (user == null) return string.Empty;
        if (user.LoginToken == null)
            user.LoginToken = Guid.NewGuid().ToString("n");
        return user.LoginToken;
    }
    public void Logout(string loginToken)
    {
        var user = _users.FirstOrDefault(u => u.LoginToken == loginToken);
        if (user != null)
            user.LoginToken = null;
    }
}
Adding the user service endpoints
We did this already for the hello service example. Lets repeat that again with the injected dependency on the data layer we just created. Because we now have an injected dependency, we will also have to provide our Niject container to the fluent builder so that it can build our service.
In your Startup.cs file, modify the line of code that registers our executing assembly with the fluent builder to get it to use Ninject to build our service. The modified line of code looks like this:
fluentBuilder.Register(Assembly.GetExecutingAssembly(), t => ninject.Get(t));
Now we can go ahead and add the service endpoints.
UserServiceEndpoints.cs
using OwinFramework.Pages.Core.Attributes;
using OwinFramework.Pages.Core.Enums;
using OwinFramework.Pages.Restful.Interfaces;
using OwinFramework.Pages.Restful.Parameters;
[IsService("user", BasePath = "/auth/", Methods = new[] { Method.Get, Method.Post })]
public class UserServiceEndpoints
{
    private readonly IDataLayer _dataLayer;
    public UserServiceEndpoints(IDataLayer dataLayer)
    {
        _dataLayer = dataLayer;
    }
    [Endpoint(Methods = new[] { Method.Get })]
    public void Users(IEndpointRequest request)
    {
        request.Success(_dataLayer.GetUsers());
    }
    [Endpoint(Methods = new[] { Method.Post })]
    [EndpointParameter("email", typeof(RequiredString), EndpointParameterType.FormField)]
    [EndpointParameter("password", typeof(RequiredString), EndpointParameterType.FormField)]
    public void Register(IEndpointRequest request)
    {
        var email = request.Parameter<string>("email");
        var password = request.Parameter<string>("password");
        request.Success(_dataLayer.Register(email, password));
    }
    [Endpoint(Methods = new[] { Method.Post })]
    [EndpointParameter("email", typeof(RequiredString), EndpointParameterType.FormField)]
    [EndpointParameter("password", typeof(RequiredString), EndpointParameterType.FormField)]
    public void Login(IEndpointRequest request)
    {
        var email = request.Parameter<string>("email");
        var password = request.Parameter<string>("password");
        request.Success(_dataLayer.Login(email, password));
    }
    [Endpoint(Methods = new[] { Method.Post })]
    [EndpointParameter("token", typeof(RequiredString), EndpointParameterType.QueryString)]
    public void Logout(IEndpointRequest request)
    {
        var token = request.Parameter<string>("token");
        _dataLayer.Logout(token);
        request.Success();
    }
}
At this point we have a fully functional microservice and you can test it using a tool like PostMan. Even though it is complete we will be adding more to it below to achieve the specification we were looking for. First of all lets explain this source file in detail.
The Users() method can be called with a GET request to the url /auth/users. This endpoint just calls the data layer and serializes the list of users to JSON. You can press F5 in Visual Studio and append /auth/users to the url and your service should return an empty array of users.
The Register() method must be called using a POST request, and takes two parameters. The EndpointParameter attributes define that these are form fields and that they must be non-empty strings. If you call this endpoint with invalid parameters then the Owin Framework will return a 400 response status with a validation message.
To read the parameters that were passed in, the Users() method calls the Parameter() method of the request passing the name of the parameter. The Owin Framework will parse the body of the POST as a form and extract the form field values, validate them and return the value to the appllication.
Adding some forms to test it
To fully test this we need to be able to POST some forms, and since some microservices have a user interface, we are going to go ahead and see an example of how we might easily add a user interface to our microservice. Note that this step is completely optional since many microservices do not have any UI. If you are using this tutorial as a stating point for your own microservice and you don't have any UI then I recommend removing the dependency on the Owin.Framework.Pages.Html Nuget package from your project to keep things clean.
In this case we can add some simple forms by adding an html file to our project and serving this as a static asset. We could do this with a service endpoint, but the Owin Framework Static Files middleware will do it much better.
To add the Static File middleware you will need to
- Add the Owin.Framework.StaticFiles Nuget package to the solution.
-
Add the static files middleware to the Owin Framework pipeline builder as described in
the readme.md
file for the Static Files middleware.For example:
pipelineBuilder.Register(ninject.Get
()).As("Static files").ConfigureWith(config, "/staticFiles"); -
Optionally define a configuration for the Static Files middleware that tells it which folder to serve files from, the base URL to serve them under, the mime type to return for each file type and the caching policy for each file type.
The readme.md file for the Static Files middleware has documentation for the configuration options.
This step is optional, if you do not configure the Static Files middleware it will default to serving common image formats, html, css and Javascript from an /assets folder within your website where the URL path matches the file path. This default configuration will work for this walk through.
Test that the Static Files middleware is working by adding an assets folder to your Visual Studio project and creating a simple html file in this folder.
For example if you create a file /assets/hello.html containing the html below, then you can press F5 to debug the solution, then navigate to /assets/hello.html in your browser.
<html>
    <head>
        <title>Hello, world - again</title>
    </head>
    <body>
        <p>Hello, world</p>
    </body>
</html>
The next step is to add a page containing a form that we can use to call our microservice endpoint. This is not a tutorial in writing html, so you can just copy and paste the html below into a new page and serve it using the Static Files middleware just like we did for the hello world example above.
<html>
<head>
  <title>User microservice tests</title>
  <style>
    * {
        box-sizing: border-box;
    }
    body {
        background-color: #eeeeee;
    }
    form {
        background-color: #ffffff;
        width: 500px;
        margin: 50px auto 10px auto;
        padding: 30px;
        border-radius: 8px;
        overflow: hidden;
        box-shadow: 0 2px 10px -3px #333;
        text-align: center;
    }
    input {
        border-radius: 100px;
        padding: 10px 15px;
        width: 50%;
        border: 1px solid #D9D9D9;
        outline: none;
        display: block;
        margin: 20px auto 20px auto;
    }
    input[type = "submit"] {
        border-radius: 100px;
        border: none;
        background: #719BE6;
        width: 50%;
        padding: 10px;
        color: #FFFFFF;
        margin-top: 25px;
        box-shadow: 0 2px 10px -3px #719BE6;
        display: block;
        margin: 55px auto 10px auto;
    }
    a {
        text-align: center;
        margin-top: 30px;
        color: #719BE6;
        text-decoration: none;
        padding: 5px;
        display: inline-block;
    }
    a:hover {
        text-decoration: underline;
    }
  </style
</head>
<body>
    <form action="/auth/register" method="post">
        <h3>Register</h3>
        <input type="email" name="email" placeholder="Email">
        <input type="password" name="password" placeholder="Password">
        <input type="submit" value="Register">
    </form>
    <form action="/auth/login" method="post">
        <h3>Login</h3>
        <input type="email" name="email" placeholder="Email">
        <input type="password" name="password" placeholder="Password">
        <input type="submit" value="Login">
    </form>
    <form action="/auth/logout" method="post">
        <h3>Logout</h3>
        <input type="text" name="token" placeholder="Login token">
        <input type="submit" value="Logout">
    </form>
</body>
</html>
Note that the name attributes of the input elements define the names that will be used to send the request to the microservice when the user submits the form. These names must match the names of the parameters that the service endpoint is expecting. For example the name attribute of this element:
<input type="email" name="email" placeholder="Email">
Must correspond with the parameter name this service endpoint parameter:
[EndpointParameter("email", typeof(RequiredString), EndpointParameterType.FormField)]
Now you can test your microservice. Press F5 then navigate to the page we just added. Register with an email address and a password, then navigate to /auth/users to see that the microservice now returns a list of users that are logged in.
Adding a management UI
There are many choices available for creating a UI. The Pages part of the Owin Framework is designed to provide complete flexibility to cater to all the different kinds of website and web services that exist from a simple UI on a microservice to a website with millions of pages being served to billions of users.
The Owin Framework deliberately does not define anything about how your website works so that you have the freedom to choose any architectural pattern that you like. This does however mean that you need to choose an architecture and write some logic to glue the pieces together in a way that realizes that design. The Owin Framework has all of the pieces that you need and makes every effort to make these pieces fit together easily in any configuration that you want, but it is not designed to be an off-the-shelf solution that chooses the design pattern for you.
For the purpose of this walkthrough I have decided to show you how to build website pages where each page is defined by a Vue.js view model. I will define each page of the website with a Javascript file and an html file. This is simple and efficient way of doing things for a microservice that has only a few pages. It does provide all the features that we need to build a UI that displays all of the logged in users and dynamically updates as users log in and out without refreshing the page, and it demonstrates a few more features of the Owin Framework.
The steps for this part of the walkthrough are:
- Create a folder containing html and Javascript files that will be loaded and parsed as templates
- Configure the template loader to load and parse these templates at startup and reload them if they change
- Add a component that takes the path of the URL and uses this to form a template path, then renders the contents of the html and Javascript templates into the page
- Add a web page that matches a wildcard path and renders the component.
After these steps are completed we will be able to add as many pages as we like to the microservice simply by adding new files to the folder containing the templates
Loading templates
The Owin framework comes with a template loader and a selection of template parsers. The framework was designed to make it easy to write your own loader and/or add your own parsers and have them work together.
For this tutorial we are going to add a /templates folder to our project and put some html and Javascript files into it, then we are going to load and parse these files so that they will render extremely quickly even if they contain data binding expressions etc.
Go ahead and open up your Startup.cs file and just before calling the Bind() method of the name manager, add these lines of code:
var parser = ninject.Get<OwinFramework.Pages.Html.Templates.AsIsParser>();
var fileLoader = ninject.Get<OwinFramework.Pages.Html.Templates.FileSystemLoader>();
fileLoader.Load(parser);
At this point your Startup.cs file might look something like this:
using Ioc.Modules;
using Microsoft.Owin;
using Ninject;
using Owin;
using OwinFramework.Builder;
using OwinFramework.Interfaces.Builder;
using OwinFramework.StaticFiles;
using OwinFramework.Pages.Core;
using OwinFramework.Pages.Core.Interfaces.Builder;
using OwinFramework.Pages.Core.Interfaces.Managers;
using System.Reflection;
[assembly: OwinStartup(typeof(Startup))]
public class Startup
{
    public void Configuration(IAppBuilder app)
    {
        var packageLocator = new PackageLocator()
            .ProbeBinFolderAssemblies()
            .Add(Assembly.GetExecutingAssembly());
        var ninject = new StandardKernel(new Ioc.Modules.Ninject.Module(packageLocator));
        var config = ninject.Get<IConfiguration>();
        var pipelineBuilder = ninject.Get<IBuilder>();
        pipelineBuilder.Register(ninject.Get<PagesMiddleware>()).ConfigureWith(config, "/pages");
        pipelineBuilder.Register(ninject.Get<StaticFilesMiddleware>()).ConfigureWith(config, "/staticFiles");
        app.UseBuilder(pipelineBuilder);
        var fluentBuilder = ninject.Get<IFluentBuilder>();
        ninject.Get<OwinFramework.Pages.Restful.BuildEngine>().Install(fluentBuilder);
        ninject.Get<OwinFramework.Pages.Html.BuildEngine>().Install(fluentBuilder);
        fluentBuilder.Register(Assembly.GetExecutingAssembly());
        var parser = ninject.Get<OwinFramework.Pages.Html.Templates.AsIsParser>();
        var fileLoader = ninject.Get<OwinFramework.Pages.Html.Templates.FileSystemLoader>();
        fileLoader.ReloadInterval = TimeSpan.FromSeconds(3);
        fileLoader.Load(parser);
        ninject.Get<INameManager>().Bind();
    }
}
For this to work you will need to have a /templates folder in your project. Go ahead and add this folder now. We will add template files to it later.
Adding a component
The next step is to add a component that will translate the URL of the page it is on into the path of the template files, load these templates and render them into the page.
In this framework the page class is responsible for writing the page structure to the output stream and components are responsible for everything that is written within the page structure. In practice you are unlikely to write your own page classes because the structure of an html page is well defined, but you are very likely to want to write components.
The code required for this component is shown below:
using Microsoft.Owin;
using OwinFramework.Pages.Core.Attributes;
using OwinFramework.Pages.Core.Enums;
using OwinFramework.Pages.Core.Interfaces.Builder;
using OwinFramework.Pages.Core.Interfaces.Managers;
using OwinFramework.Pages.Core.Interfaces.Runtime;
using OwinFramework.Pages.Html.Elements;
using OwinFramework.Pages.Html.Runtime;
[IsComponent("vue_template")]
[NeedsComponent("libraries:vue")]
[NeedsComponent("ajax:ajax")]
internal class VueTemplate : Component
{
    private readonly INameManager _nameManager;
    private readonly PathString _basePath = new PathString("/ui");
    public VueTemplate(
        IComponentDependenciesFactory dependencies,
        INameManager nameManager)
        : base(dependencies)
    {
        _nameManager = nameManager;
        PageAreas = new[] { PageArea.Body, PageArea.Initialization };
    }
    public override IWriteResult WritePageArea(IRenderContext context, PageArea pageArea)
    {
        if (pageArea == PageArea.Initialization)
        {
            PathString relativePath;
            if (context.OwinContext.Request.Path.StartsWithSegments(_basePath, out relativePath))
            {
                var templateName = relativePath.Value + "model";
                var modelTemplate = _nameManager.ResolveTemplate(templateName);
                if (modelTemplate == null)
                {
                    context.Html.WriteComment("No model template found in '" + templateName + "'");
                }
                else
                {
                    context.Html.WriteComment("Model template '" + templateName + "'");
                    context.Html.WriteScriptOpen();
                    context.Html.WriteLine();
                    modelTemplate.WritePageArea(context, PageArea.Body);
                    context.Html.WriteScriptClose();
                }
            }
        }
        if (pageArea == PageArea.Body)
        {
            PathString relativePath;
            if (context.OwinContext.Request.Path.StartsWithSegments(_basePath, out relativePath))
            {
                var templateName = relativePath.Value + "view";
                var viewTemplate = _nameManager.ResolveTemplate(templateName);
                if (viewTemplate == null)
                {
                    context.Html.WriteComment("No view template found in '" + templateName + "'");
                }
                else
                {
                    context.Html.WriteComment("View template '" + templateName + "'");
                    viewTemplate.WritePageArea(context, PageArea.Body);
                }
            }
        }
        return WriteResult.Continue();
    }
}
As you can see, a component is just a class with an IsComponent attribute attached to it. The fluent builder will discover this component through reflection at startup and register it with the name manager so that other elements can refer to it by name. The name of this component is defined by the IsComponent properties. In this case the component name is vue_template
Most components inherit from the Component class and override the WritePageArea method as this component does. There are a number of other virtual methods that you can override and you can also choose to build a fully custom component by directly implementing the IComponent interface.
The WritePageArea method is passed a PageArea parameter that defines which part of the page is currently being written. Components should check this parameter and write appropriate content to each area of the page. In the case of this component it writes the html template into the body of the page and the Javascript at the very bottom of the page where page initialization takes place.
Note how this class uses the name manager to find templates that are registered with a specific path. The template loader that we configured earlier will register the templates that it loads using the relative path of the template file without the file extension. This component constructs the template name from the path from the page URL and the words "model" and "view", so we need to create template files with this naming convention for this to all work.
Serving pages
In order to handle requests and return pages of html we need to add some page elements to our project. This is as simple as adding classes decorated with the IsPage attribute. Each page has a defined layout and the layout can define regions and each region can contain various things including components and further layouts.
For the purpose of this tutorial we just need to define one page class with a wildcard path specification to that it will handle requests for all URLs that match the wildcard pattern. In this case we just need a very simple layout for the page that has a single region that contains the component that we wrote earlier. The page, layout and region classes look like this:
using OwinFramework.Pages.Core.Attributes;
[IsPage("vue_template"), Route("/ui/**"), UsesLayout("vue_template_page")]
public class VueTemplatePage { }
[IsLayout("vue_template_page", "page"), ZoneRegion("page", "vue_template_page")]
public class VueTemplatePageLayout { }
[IsRegion("vue_template_page"), UsesComponent("vue_template"), Container(null)]
public class VueTemplatePageRegion { }
Pulling in additional libraries
We decided that we were going to use Vue.js and that's great, but we did not put anything in our source code yet to actually include the Vue.js libraries in our pages - or did we?
Take a look at the code for our component, it has an attribute attached like this:
[NeedsComponent("libraries:vue")]
This attribute tells the Pages framework that any page containing this component must also contain a component called "libraries:vue". This component will be added into any page that contains our "vue_template" component. This brings up the topic of packages.
A package in this framework is a collection of pages, layouts, components, templates etc that can be deployed in a .Net assembly and included in any other project. These exist because websites often need the same functionallity and we do not want to rewrite it over and over. This website for example is built with the Pages framework and contains a responsive menu. The menu implementation is not part of this websites source code, it is contained in a package that is distributed with the pages framework itself.
Packages can be very small and contain very little, or they can be really big. For example the standard "libraries" package contains components that just render a reference to various standard libraries (like Vue.js, Angular, React etc) into the head of the page, whereas the Pages framework contains an entire Content Management System UI that is also shipped as a package and can be added into any website.
To add the packages we need for this tutorial we need to add the Owin.Framework.Pages.Standard NuGet package to the project and the DotlessClientOnly NuGet package that it depends on. Now go back to the Startup.cs file and register these packages with the fluent builder. The code to add to Startup.cs looks like this:
ninject.Get<OwinFramework.Pages.Framework.BuildEngine>().Install(fluentBuilder); fluentBuilder.RegisterPackage(ninject.Get(), t => ninject.Get(t)); fluentBuilder.RegisterPackage(ninject.Get (), t => ninject.Get(t));
You should add this code after constructing the fluent builder and before calling the Bind method of the name manager.
At this point my Startup.cs file looks like this:
using Ioc.Modules;
using Microsoft.Owin;
using Ninject;
using Owin;
using OwinFramework.Builder;
using OwinFramework.Interfaces.Builder;
using OwinFramework.Pages.Core;
using OwinFramework.Pages.Core.Interfaces.Builder;
using OwinFramework.Pages.Core.Interfaces.Managers;
using OwinFramework.Pages.Html.Templates;
using OwinFramework.Pages.Standard;
using OwinFramework.StaticFiles;
using System.Reflection;
[assembly: OwinStartup(typeof(Startup))]
public class Startup
{
    public void Configuration(IAppBuilder app)
    {
        var packageLocator = new PackageLocator()
           .ProbeBinFolderAssemblies()
           .Add(Assembly.GetExecutingAssembly());
        var ninject = new StandardKernel(new Ioc.Modules.Ninject.Module(packageLocator));
        var config = ninject.Get<IConfiguration>();
        var pipelineBuilder = ninject.Get<IBuilder>();
        pipelineBuilder.Register(ninject.Get<StaticFilesMiddleware>())
            .As("Static files")
            .ConfigureWith(config, "/staticFiles");
        pipelineBuilder.Register(ninject.Get<PagesMiddleware>()).ConfigureWith(config, "/pages");
        app.UseBuilder(pipelineBuilder);
        var fluentBuilder = ninject.Get<IFluentBuilder>();
        ninject.Get<OwinFramework.Pages.Restful.BuildEngine>().Install(fluentBuilder);
        ninject.Get<OwinFramework.Pages.Html.BuildEngine>().Install(fluentBuilder);
        ninject.Get<OwinFramework.Pages.Framework.BuildEngine>().Install(fluentBuilder);
        fluentBuilder.RegisterPackage(ninject.Get<LibrariesPackage>(), t => ninject.Get(t));
        fluentBuilder.RegisterPackage(ninject.Get<AjaxPackage>(), t => ninject.Get(t));
        fluentBuilder.Register(Assembly.GetExecutingAssembly(), t => ninject.Get(t));
        var parser = ninject.Get<AsIsParser>();
        var fileLoader = ninject.Get<FileSystemLoader>();
        fileLoader.ReloadInterval = TimeSpan.FromSeconds(2);
        fileLoader.Load(parser);
        ninject.Get<INameManager>().Bind();
    }
}
Adding templates
Most of this microservice is now built, and most of the work we did so far is a one-time setup that will allow us to add as many pages as we like in the future. It is time now to add some templates and see some output from all this coding.
The way that we wrote our component says that it will take a URL path like /ui/hello and try to load two templates called HelloModel and HelloView from the name manager. We configured the template loader to load files from the /templates folder. It will register these as templates without the file extension, so in this case we need to create two files called /templates/HelloView.html and /templates/HelloModel.js. In fact the file extensions do not matter at all since they are discarded, but they are useful for getting Visual Studio to provide the correct Intellisense. In fact the template loader deliberately discards the file extension when creating the template name so that you can change the extension and potentially change the parser without having to change any of the places where you reference this template.
Go ahead and create these two files. Sample source code follows:
/templates/HelloView.html
<div id="hello">{{message}}</div>
/templates/HelloModel.js
new Vue({
    el: "#hello",
    data: {
        message:"Hello with Vue"
    }
})
Now debug your solution and navigate to /ui/hello and you should see a page rendered by Vue.js using the two templates that we just created. Here are some things for you to try:
- Right click and view source. Take note of how the page is constructed, and see the comments that were output by our component. Naturally enough you can turn comments off for your production deployment through a configuration switch in the Pages framework.
- Try modifying the templates whilst the website is running then refresh the page. You should see the updated version because we configured to the template loader to check the templates for updates every few seconds.
- Change the layout of the page to include another region that contains some static html. Note how this would allow us to add headers and footers to every page served by the microservice without having to add these elements to our Vue templates.
Displaying a list of logged in users
The steps required for this part of the tutorial are:
- Add a new endpoint to our service that returns a list of logged in users
- Add a new pair of template files for the view and the model just like we did for the hello example
- Add Javascript to call the new service endpoint when the template is loaded in the browser
The new service endpoint can be added to the existing service like this:
[IsService("user", BasePath = "/auth/", Methods = new[] { Method.Get, Method.Post })]
[GenerateClientScript("userServiceClient")]
public class UserServiceEndpoints
{
}
Note that we added an extra attribute here because we will be calling this from javaScript, and we can take advantage of a cool feature of the Pages framework where it will generate a component that will render Javascript for us that makes it easy to make Ajax calls to this endpoint.
We need to add the new component to our pages. We can do this by directly adding it to the page, or making our "vue_template" component have a dependency on it. Since not all templates need this I am going to add it to my page like this
[IsPage("vue_template"), Route("/ui/**"), UsesLayout("vue_template_page"). NeedsComponent("userServiceClient")]
public class VueTemplatePage { }
Now that we have the endpoint we need and some Javascript generated for us that makes it easy to call, we can go ahead and add the new template files as follows:
/templates/UsersView.html
<div id="users">
    <table>
        <tr>
            <th>Email</th>
            <th>Token</th>
        </tr>
        <tr v-for="user in users">
            <td>{{user.Email}}</td>
            <td>{{user.LoginToken}}</td>
        </tr>
    </table>
</div>
/templates/UsersModel.js
new Vue({
    el: "#users",
    data: {
        users:[]
    },
    created: function () {
        var vm = this;
        userService.users({}, function (users) { vm.users = users; });
    }
})
And we can see this in our browser by navigating to /ui/users. You will have to use the forms we created earlier to register or login or course to see any users in the list.
Dynamically updating the list of logged in users
There are lots of ways to do this. If i wanted to get all fancy I could use SignalR, but keeping it relatively simple, we can just do a long poll. The changes needed are actually very small. We just need the service endpoint to not return right away, but wait a bit before returning. In a robust implementation it would wait for a login/logout event then complete all of the outstanding long poll requests, but that would be getting all fancy again. On the Javascript side we just need to kick off another call to the service endpoint each time the current one completes.
The new service endpoint looks like this:
... to be completed...
And the updated Vue.js model looks like this:
... to be completed...
That is is for this tutorial. I hope you learned a lot about how to get started writing microservices with the Pages framework. Please read the documentation for the Owin.Framework.Pages.Restful Nuget package for further information.